This help article describes how to insert and edit content in message that uses one of Direct Mail's built-in templates (or a custom template that you derived from a built-in template). If you haven't already, please learn about how to choose or import a template.
Editor Basics
You will primarily use the content toolbar and the inspector when editing your message. Remember that you can always undo any changes you don't like by choosing Edit > Undo from the menu bar at the top of your screen.
Content Toolbar
The content toolbar is located directly above the body of your message. Click the buttons in the toolbar to insert content into your message:
- New sections
- Text blocks
- Links
- Mail-merge tags (used to personalize your message)
- Image blocks
- Video blocks
- Map blocks
- Button blocks
- Spacers
- Poll blocks
- Social follow blocks
- Social share blocks
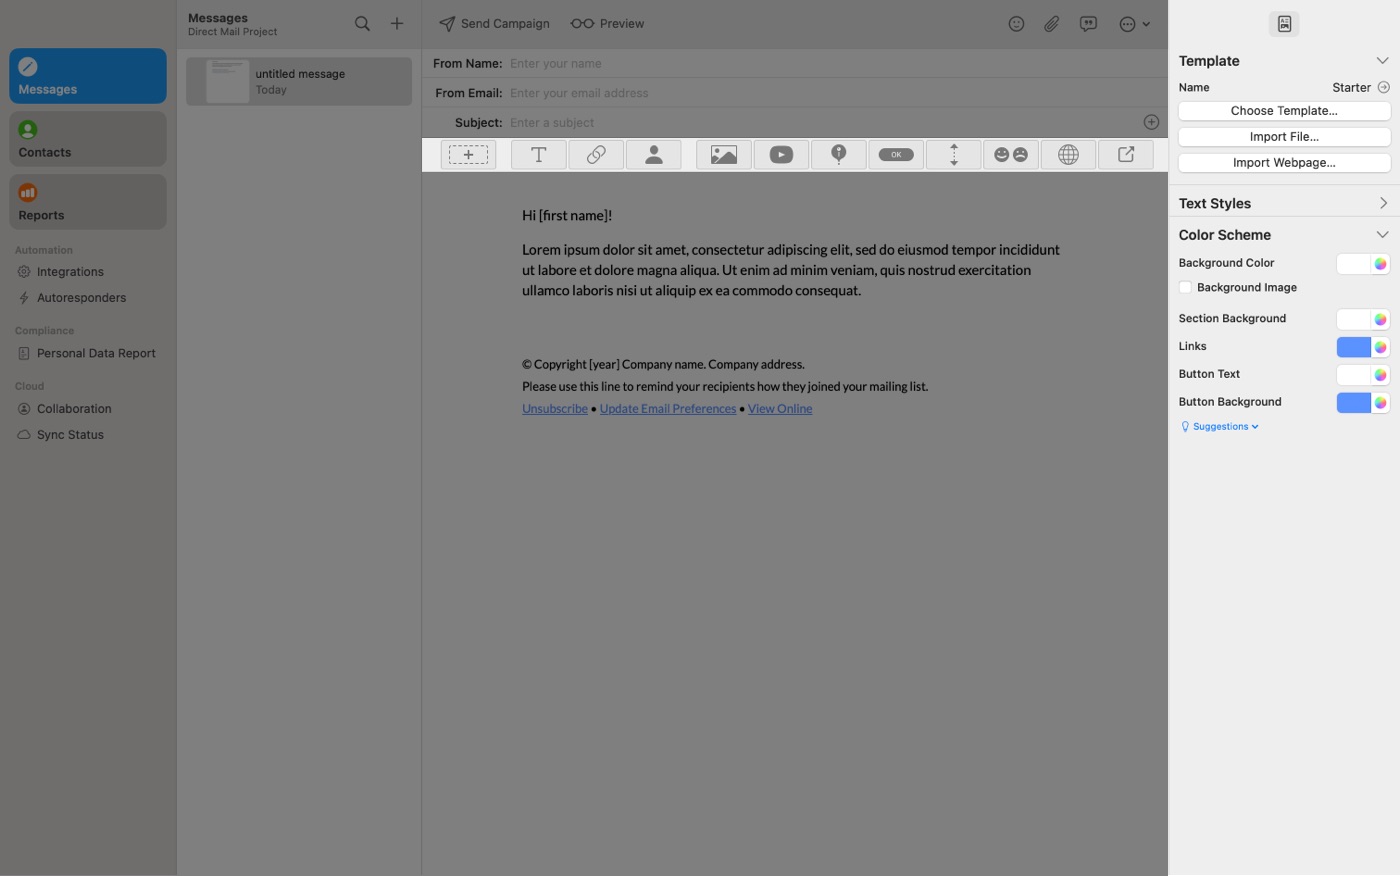
Inspector
The inspector is located along the right-hand side of the window. As you select different elements of your message, the inspector updates to show you properties of the selected element and controls for editing the selected element. For example, controls to replace or resize an image, change a text style, edit a button title, etc.
At the top of the inspector is a tab bar. The tab bar divides the inspector up into different tabs:
- Design tests created for the currently selected message. Not shown if no design tests have been created
- Properties that apply to the entire message: template, color scheme, text styles
- Properties that apply to the selected section
- Properties that apply to the selected block
Each tab is divided up into collapsible sections. You can expand or collapse a section by clicking on the title of the section or the disclosure arrow next to the title. Most sections are expanded by default.
Text Styles
Your message has a set of text styles that are used to apply a consistent look to all the text in your message. The initial styles are inherited from the template that you choose for your message, but you can edit them in the inspector:
- Select the Message tab of the inspector
- Expand the Text Styles section
- Edit the style by double-clicking the name (e.g. Heading 1) or by clicking Edit. You can edit multiple styles at once by clicking Edit next to each style you want to edit.
Direct Mail comes with a large library of fonts built-in that are safe to use in your message. If you want to use a font that does not appear in the list, please consult this help article first.
Color Schemes
Your message also has a color scheme that provides default colors to the various elements of your message. The color scheme is inherited from the template that you choose for your message, but you can edit it in the inspector:
- Select the Message tab of the inspector
- Expand the Color Scheme section
- Use the color picker to choose colors
Tips for Using the Color Picker
- Hold down the option key on your keyboard while clicking the color swatch to immediately activate the eyedropper
- To enter hex color codes, open the color palette, select the Color Sliders tab, choose RGB Sliders, and input the code into the Hex Color text field
- To reuse a color that you used before, click the color swatch. The bottom row of colors are the colors that are currently being used in this message.
- To reuse a color, click and drag the color from the color swatch and drop it on any other color picker.
Automatically Generate a Color Scheme
Direct Mail can analyze an image (e.g. your business logo) and automatically create a color scheme that matches the image:
- Select the Message tab of the inspector
- Expand the Color Scheme section
- Click Suggestions and choose Create Color Scheme from Image
- Select an image file and click Open
A color scheme is automatically generated and applied to your message. If you don't like it, you can adjust it or undo it altogether (by choosing Edit > Undo from the menu bar at the top of your screen).
Layout Basics
A message is composed of one or more sections. Sections are arranged vertically, from top to bottom. A section has a layout that defines how the content inside of it is arranged:
- 1 Column
- 2 Column
- 3 Column
- etc.
Each section contains zero or more blocks. A block is a piece of a content: a block of text, an image, a button, a spacer, etc. Blocks are arranged vertically inside of a section, from top to bottom.
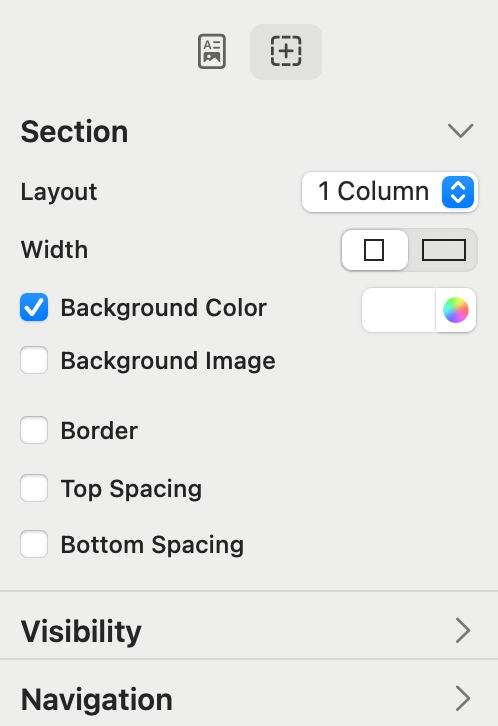
Sections
Add a new section to your message by clicking the Section button in the content toolbar:

Click where you would like to place the section. Sections can only be placed above or below other sections.
To edit a section, click anywhere on the section. Use the inspector to view and edit properties:
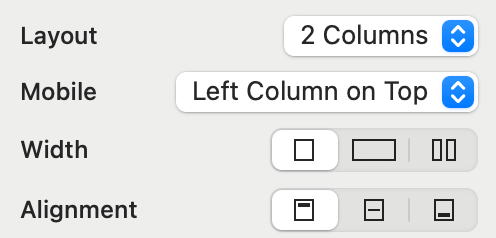
Layout on Mobile
If you select a multi-column layout for your section, the layout your recipients see will differ based on the size of their screen/window. On sufficiently wide screens, the columns will appear side-by-side. On narrow screens, the columns will appear one on top of the other. If you select a two-column layout, you can choose which column (left or right) appears on top.
Use the Preview window to see how your message looks on various screen sizes.
Visibility
The settings in this section of the inspector determine when the section is made visible to recipients. Learn more
Navigation
The settings in this section of the inspector are used to give the section a name. If you name a section, you can create links to it. For example, you might create a table of contents at the top of your message that links to sections later on in the message.
Blocks
Add a new block to your message by clicking any of the block buttons in the content toolbar:

Click where you would like to place the block. Blocks are placed inside of sections, before or after other blocks. To edit a block, click anywhere on the block. Use the inspector to view and edit properties.
Types of Blocks
Text Block

Use a text block to insert text into your message. Use the inspector to adjust text style, fonts, and other formatting. Where possible, prefer using text styles instead of custom font styles in order to keep formatting consistent across your message—and easier to change.
Add or Edit Links
To add a link:
- Select the text you want to become a link
- Click the Link button in the content toolbar

- Choose the type of link from the menu that appears
- Enter the URL (or email, phone number, etc. as appropriate)
To edit or remove a link, click on it. A popover appears with controls for editing or removing the link.
Image Block

Use an image block to insert an image into your message. Use the inspector to:
- Choose an image. Click Choose File or click ⋯ to choose from a variety of other sources, including:
- Apple Photos
- Google Photos
- Bing Image Search
- Unsplash
- Other images in your project
- Add a filter to your image. Filters are non-destructive. This means you can add, edit, or remove filters without altering the source image.
- Set a text description. This is important for a couple of reasons:
- Some recipients prefer plain-text emails or have image loading turned off
- Visually impaired recipients may use screen-reading software to read their emails
- Change the size. You can use the slider control, the stepper arrows, or type in a width and length.
- Set alignment
- Set spacing
- Set rounded corners
- Set a link
Video Block

Use a video block to insert a video into your message. Due to the limitations of most email apps, videos cannot play inline. To compensate, Direct Mail inserts a thumbnail of the video that, when clicked, plays the video in the recipient's browser. Use the inspector to:
- Enter the URL of the video. Rumble, TikTok, Vimeo, Wistia, and YouTube URLs are supported.
- Choose a "Play Button" graphic to overlay over the thumbnail
- Set additional image-related properties (see "Image Block" above)
Map Block

Use a map block to insert a map into your message. When the recipient clicks the map, the map region opens in Apple Maps or Google Maps (depending on the recipient's device). Use the inspector to:
- Set the region. Use your mouse, multi-touch gestures, the -/+ button, or the "Place or Address" text field to set the region, then click Use This Map Region.
- Show or hide a map pin
- Change the map type (street, satellite, or hybrid)
- Change the size
- Set additional image-related properties (see "Image Block" above)
Button Block

Use a button block to insert a button into your message. A button is just a link, but much more visually prominent. Use the inspector to:
- Set the title
- Change the style
- Change the text style
- Change the text and background colors
- Set alignment
- Set spacing
- Set the link URL
Spacer Block

Use a spacer block to insert extra vertical space into your message, or to add a horizontal divider. Use the inspector to:
- Change the height. You can also change the height of the inspector by clicking and dragging near the bottom of the spacer block.
- Show or hide a line
- Set line width, color, and alignment
Poll Block

Use a poll block to insert a poll or survey into your message. Responses to a poll appear in the campaign report. Recipients can respond to a poll multiple times, but only their most recent response is counted in the results. A message can contain more than one poll. Use the inspector to:
- Name the poll. This name does not appear in the message itself and is not visible to recipients, but is displayed in your campaign report.
- Set layout (horizontal or vertical)
- Set alignment
- Add spacing
- Set the text style
- Add, remove, edit, or reorder the poll choices. You can use the Suggestions menu to insert common poll choices.
- Randomize poll choices. Enable this setting if you want each recipient to see the poll choices listed in a different order. This can help eliminate bias in the responses.
- Add a prompt. A prompt is just a text block that appears above the poll.
Social Follow Block

Use a social follow block to give your recipients a convenient way to follow you on social media. The following services are supported:
- Website
- X
- Dribble
- Flickr
- GitHub
- Mastodon
- Medium
- Rumble
- Snapchat
- SoundCloud
- Spotify
- TikTok
- Tumblr
- Vimeo
- YouTube
Use the inspector to:
- Add or remove social media services. If you leave a text field blank, then the icon for that social media service will be hidden.
- Change the style (text only, color icons, white icons, black icons, tinted icons)
- Set alignment
- Set spacing
Social Share Block

Use a social share block to give your recipients a convenient way to share your campaign on social media. When a social share block is added to your message, Direct Mail automatically generates a web version of your campaign. When a recipient clicks on a social sharing link, the URL to the web version is shared. The following services are supported:
- Email (Forward to a Friend)
- X
Use the inspector to:
- Enable or disable sharing on a particular service
- Change the style (text only, color icons, white icons, black icons, tinted icons)
- Set alignment
- Set spacing
Plain Text Alternative
By default, Direct Mail prepares a plain-text version of your message. This is used for email clients that don't support HTML (like some smartwatches) and for recipients that prefer to to view plain-text. You can also create a custom plain-text version of your message:
- Select your message
- Choose Message > Plain Text Alternative > Manual from the menu bar at the top of your screen
- Edit the plain-text message that appears at the bottom of the window